


Email Coexistence for BPOS and Exchange: Part 2 – How to Synchronize Active Directory with BPOS
Part I of this article series explained how email coexistence with BPOS and your local on-premise exchange system works. We also walked through the first steps to configure this.
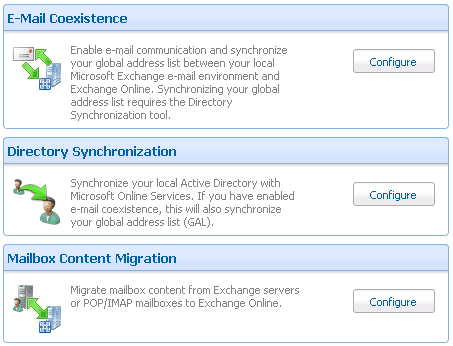
To recap, configuring email coexistence with BPOS requires the following steps:
- Add your own domain to BPOS and enable external relay (Covered in Part I)
- Verify the domain (Covered in Part I)
- Verify email traffic flow
- Enable Active Directory Synchronization
- Activate migrated users
- Migrate mailboxes to BPOS
- Optional steps: Configure SPF and secure the mail flow
This 2nd installment covers steps 3 and 4:
- Verify email traffic flow
- Enable Active-Directory Synchronization
Step 3: Verify Email Traffic Flow
This step may seem out of order, but it’s actually very important. Before configuring Active-Directory sync, it’s crucial to verify that the two SMTP domains used for coexistence can successfully communicate.
As explained in part I of this article series, BPOS makes it look as if all users are using the same SMTP domain, whether using BPOS or your on-premise Exchange. However, behind the scenes it uses two different domains, and some tricky forwarding techniques. So, it’s important to verify that the two domains can talk to each other.
For this example we’ll continue to use the sample domain bpostutorials.com, and the BPOS domain bpostutorial.microsoftonline.com.
To verify email flow:
- In your BPOS environment, create a test user with a mailbox in the microsoftonline.com domain. For example, [email protected]
- Create a test user in your on-premise Exchange environment. For example, [email protected]
- Log on to the BPOS Outlook Web Access as [email protected]
- Send an email message to [email protected]
- Verify that UserTwo received the message, and reply back to the email.
- From OWA, confirm that UserOne received the reply.
Troubleshooting:
If messaging doesn’t work, check to confirm that the microsoftonline.com domain has been added to your safe-senders list in Exchange. It may also be worth confirming that any 3rd party Spam filters aren’t rejecting the messages, and that your MX records are configured correctly to point at your on-premise Exchange.
Don’t move on until you’ve confirmed that basic mail-flow works as expected. Email coexistence won’t work if you can’t email between the two domains.
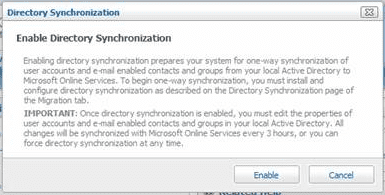
Step 4: Enable Active-Directory Synchronization
Active-Directory synchronization does exactly what you might expect. It copies your local active-directory user information over to BPOS. This simplifies user administration, since BPOS automatically has a list of all users. It also makes your full Global Address List available to all users, whether they are on BPOS or on-premise Exchange. Synchronization is performed using a tool called the “Active-Directory Synchronization Tool”, or Dirsync for short.
Dirsync will copy AD user information over to BPOS, with the exception of passwords. It will perform an initial sync, then re-sync every 3 hours. After running Dirsync, it’s important to make all user changes in your local AD, not on the Microsoft Online environment.
Before beginning, there are a few prerequisites.
- Dirsync cannot be installed on a domain controller. It must be installed on a member-server joined to the same AD forest that you plan to sync with BPOS.
- It cannot run on a 64-bit system, it must be installed on a 32-bit, Microsoft Windows Server 2003 SP2 or newer OS.
- The .NET framework 2.0 or greater must be installed on the computer that will run Dirsync
- Powershell must be installed
- Enterprise Administrator credentials for your AD will be required
- BPOS Administrator credentials will be required
To install Dirsync:
From the machine that you plan to install Dirsync on, open up the BPOS admin console, and go to the Migration tab.
In the “Directory Synchronization” section click on Configure.
The window that opens provides a series of steps.
Read the planning document under Step 1 and check the box.
Next, under Step 2, click the button to Enable Directory Synchronization.
Now, under Step 3, click the download button which will take you to the download page for Dirsync.
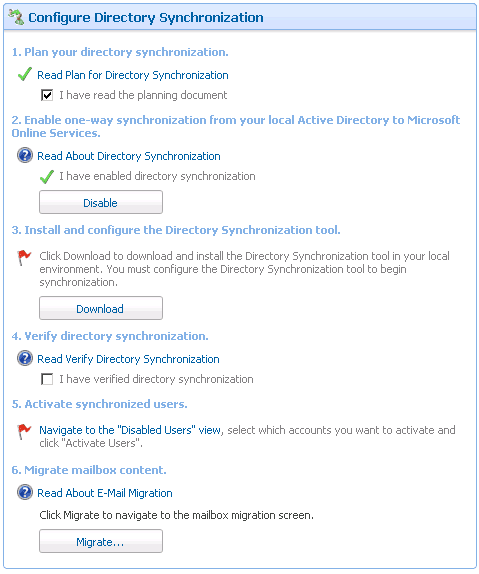
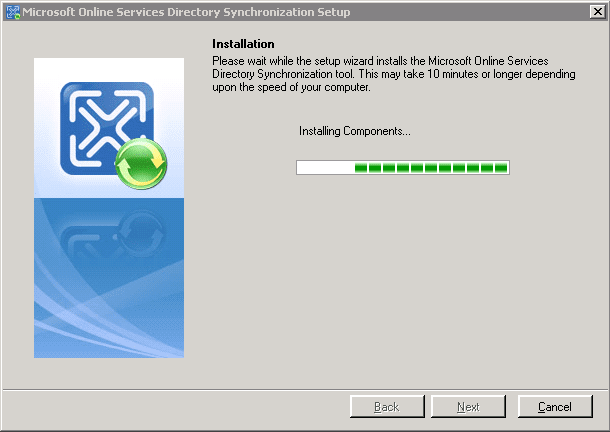
Download and run the Dirsync setup file. Go ahead and install it using all default options.
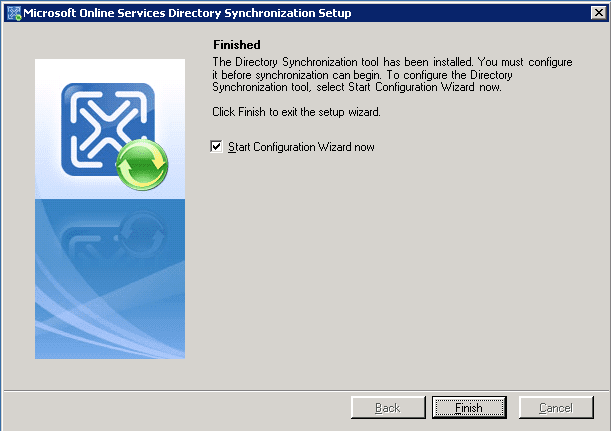
Ensure that the option to “Start Configuration Wizard now” is selected, then click Finish.
Enter your BPOS administrator’s credentials when prompted:

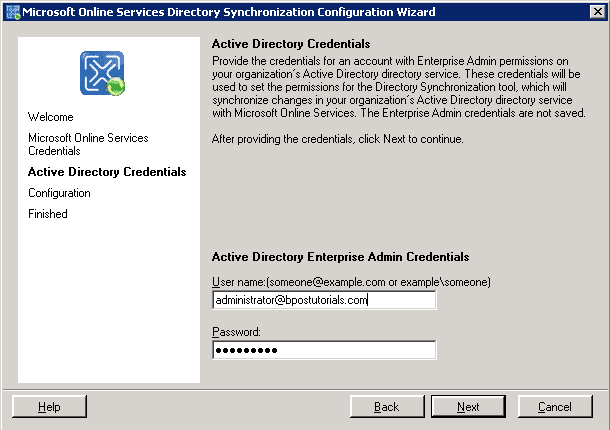
And next enter your Active-Directory Enterprise administrator credentials:
We want synchronization to start immediately, so leave the checkbox labelled “Synchronize directories now” selected, and click Finish

Verify Synchronization
There are a couple of ways to verify that synchronization is working correctly.
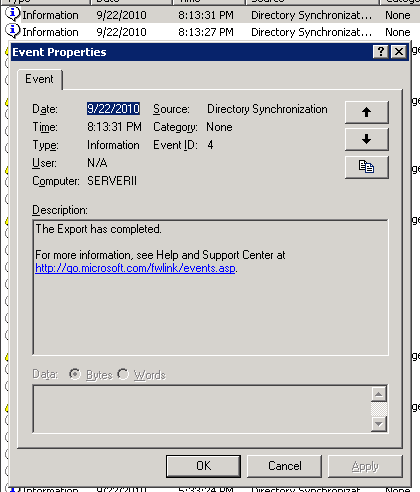
First, open up the Event Log on the server running Dirsync. Check the Application Log for events with a source of “Directory Synchronization” and Event ID 4. Events logged with ID 4 indicate that synchronization completed successfully.
Next, we can verify that users and groups were copied to BPOS. Dirsync copies all accounts over and automatically disables them in BPOS by default, so you’ll need to view “Disabled User Accounts” in BPOS to find the synchronized accounts.
To do this, log in to the BPOS admin center. Go to the Users tab, and click on the User List sub-tab. Select “Disabled User Accounts” from the left-hand navigation pane. You should see a list of user accounts that were synchronized from your own Active-Directory.

If you can see user accounts from your domain, then congratulations! Directory synchronization is working correctly. For now, leave the accounts disabled. You should only activate accounts when you’re ready to complete the user migration process.
We’ll cover the final steps required to configure email coexistence in Part 3 of this series. In Part 3 we’ll use the BPOS migration tool to copy mailbox data to BPOS, and configure the forwarding information that makes co-existence possible.