


Configuring Nokia E71 to Synchronize with Exchange Server 2007
I have recently migrated the users (and myself) in one of the companies I do consulting for, from one cellular provider to another. The new provider offered them to use Nokia E71 phones, and after some testing we began to deploy the phone. What I like about that particular phone is the simplicity of the UI and the extensible possibilities it has, without sacrificing battery power and usability like other 3G phones.
In this article I will walk you through the simple steps on how to configure your Nokia E71 cellular phone to synchronize with an Exchange Server 2007 organization.
Note: In this article I will only cover the client side (i.e. the Nokia phone) settings. I will not go into the server side details. these are covered in other articles on this site.
Assuming you have an Exchange Server 2007 which you want to sync your phone(s) with, this is the information you need:
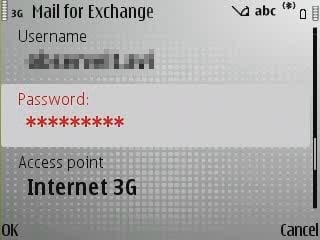
1. User name
2. User e-mail address
3. User mailbox account password
4. The user account domain name
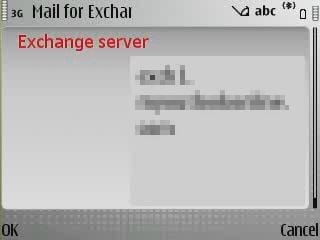
5. The FQDN of the Exchange Server CAS machine
Note: The above is not necessary if you’ve correctly published the CAS in DNS.
6. A Nokia E71 phone
Note: These steps might work on some other Nokia phones, most likely the ones using Symbian operating system. YMMV.
7. You must have a data plan from your cellular provider, otherwise you’ll get a large bill at the end of the month…
Hosting Exchange and 3rd-party providers note: If you’re hosting your mailboxes at a 3rd-party Hosted Exchange provider you may want to see what type of information that provider requires. For example, some providers may have a user naming scheme that is unique to them, or use a domain name that may not reflect the domain name that is in the e-mail address scheme. You may also need to ask them for the FQDN of the Exchange server. This may very well be entirely different than the FDQN of their OWA server address, and therefore if you’re not sure, contact them or look through their support pages.
Note regarding Exchange Server 2003: In most cases, the client side setup is identical. The only change I might think of the the FQDN (Fully Qualified Domain Name) of the published Exchange Server. Whereas in Exchange Server 2007 you publish your CAS server, in Exchange Server 2003 you simply publish the server holding the mailboxes.
Follow these steps to configure your Nokia E71 cellular phone to synchronize with an Exchange Server 2007 organization:
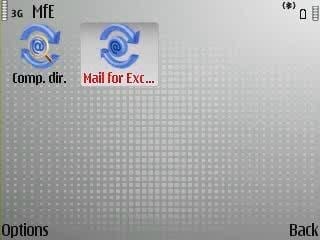
1. On the Nokia phone, click on the “Home” button. Scroll down to the MfE (Mail for Exchange) icon and click on it.

2. Inside MfE, click on the Mail for Exchange icon.
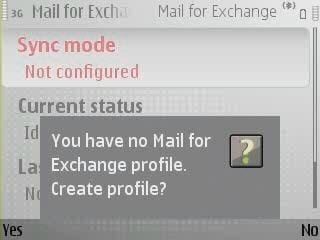
3. Because you do not yet have an Exchange synchronization profile, you’ll be prompted to create one.
4. Start filling up the required details, move to the next field after filling the previous one. You will be able to change these later, but if you do not provide valid details, it’s most likely that you will not be able to successfully save the profile.
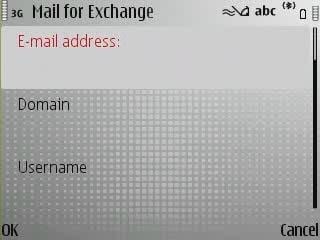
Note: As I wrote above, some 3rd-party Hosted Exchange providers will have a domain name that is totally unrelated to your e-mail domain name. If you do not know, ask for their support.
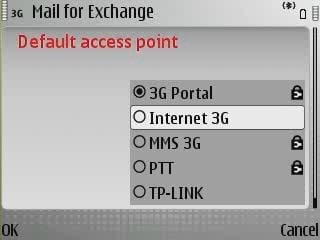
5. When you get to the Access Point setting, choose your preffered method of accessing the Internet. Needless to say, you’d better have a data plan from your cellular provider, otherwise you’ll get a large bill…
6. Click Ok. The device will now search for the Exchange server.
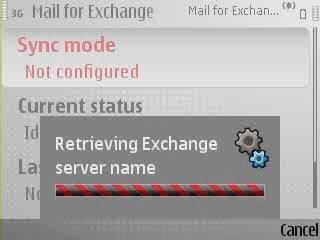
7. In case that MfE does not find the correct FQDN of the CAS server, it will prompt you to enter it. Make sure you enter the right FQDN. You do not need to add anything to it, and do not need to use HTTP or HTTPS in front of it. Click Ok when done.
8. Back in the Mail for Exchange screen, review the profile settings. You can now make any changes that you need.
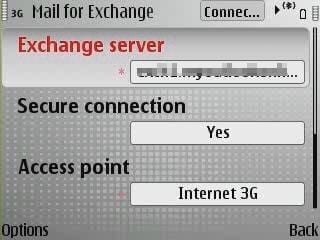
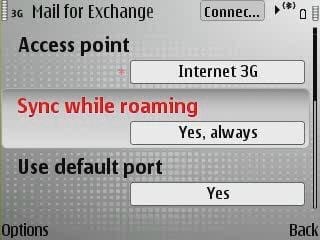
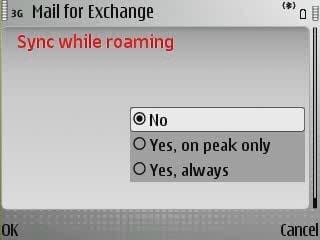
9. The first setting tab is the Connection tab. From here you can change various connection-related settings such as your access point and the Roaming sync settings:
10. Moving to the right-hand side direction with the navigation key, you can navigate through some of the other MfE settings tabs. The second tab – Credentials – will allow you to change the username, password or domain:

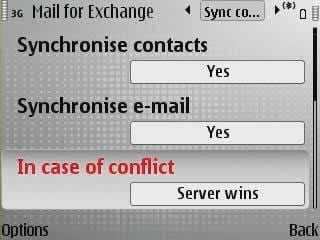
11. The third tab – Sync Content – allows you to change the items that you wish to synchronize, i.e. e-mail, calendar, tasks, contacts, and what to do in case of a client-server conflict.
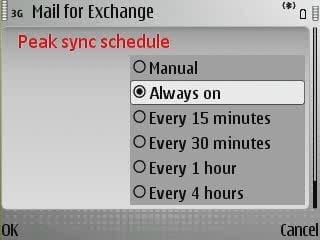
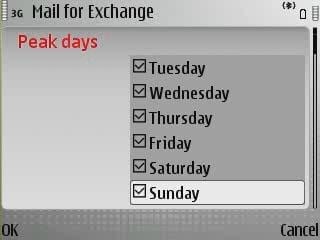
12. The fourth tab – Sync Schedule – allows you to change the synchronization schedule. To get real-time push mail capabilities – choose “Always on”. You can also change the off-peak time sync schedule, and define the peek hours and days.

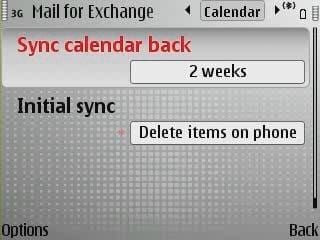
13. Next, the fifth tab – Calendar – allows you to define how past appointments are being synchronized.
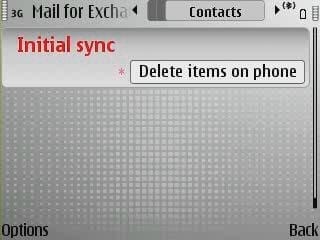
14. The sixth tab – Contacts:
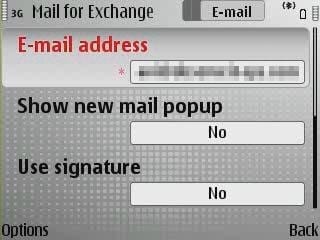
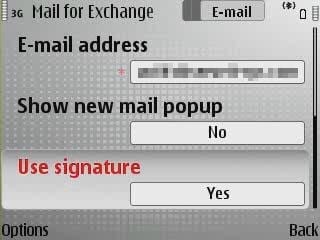
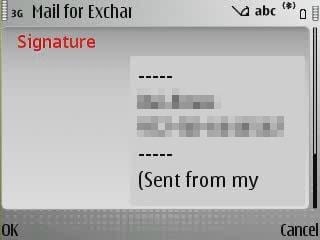
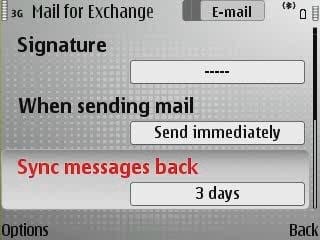
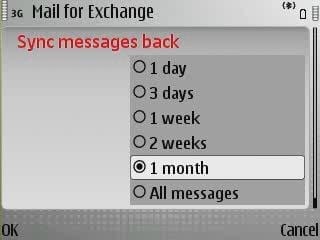
15. The next tab – E-Mail – allows you to configure an automatic signature and old mail item sync settings.
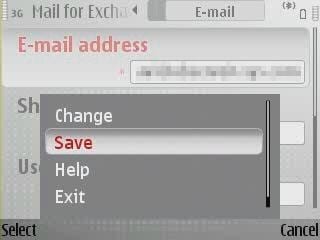
16. When done, click the Options key, then Save.
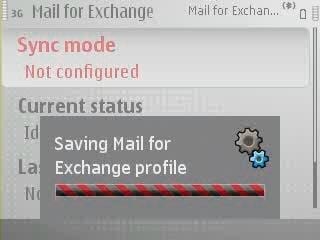
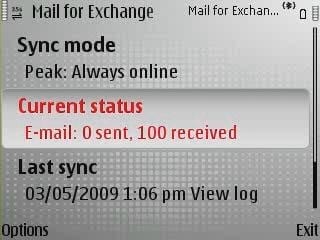
Profile will now be saved. You will now see how the content of the mailbox is synchronized. Initial synchronization will take some time.
This concludes the settings guide, now you can begin working with your phone.