How to Enable and Manage Safari’s Bookmarks Bar
For as long as there have been web pages, people have needed a way to keep track of them. Whether called Bookmarks, Favorites, or something else entirely, the concept of storing a web page address for easy recall is practically as old as the Web itself. Unfortunately, the bookmark capabilities of the built-in iOS 5.x Safari browser on the iPad and iPhone are, to put it mildly, somewhat lacking. The discomfort to users is exacerbated by the fact that web browsing is a key function of these mobile devices. One feature that can help keep track of frequently visited sites is the Bookmark Bar.
How to Enable Safari’s Bookmarks Bar
The Bookmark Bar in Safari’s browser provides quick, one-touch access to any site added to it. When enabled, it appears under the Safari address bar and above the open tabs. Notice that I said when enabled – Apple does not enable the Bookmark Bar by default in iOS. Manually turning it on isn’t exactly intuitive, but at least it’s straightforward once you know the steps.
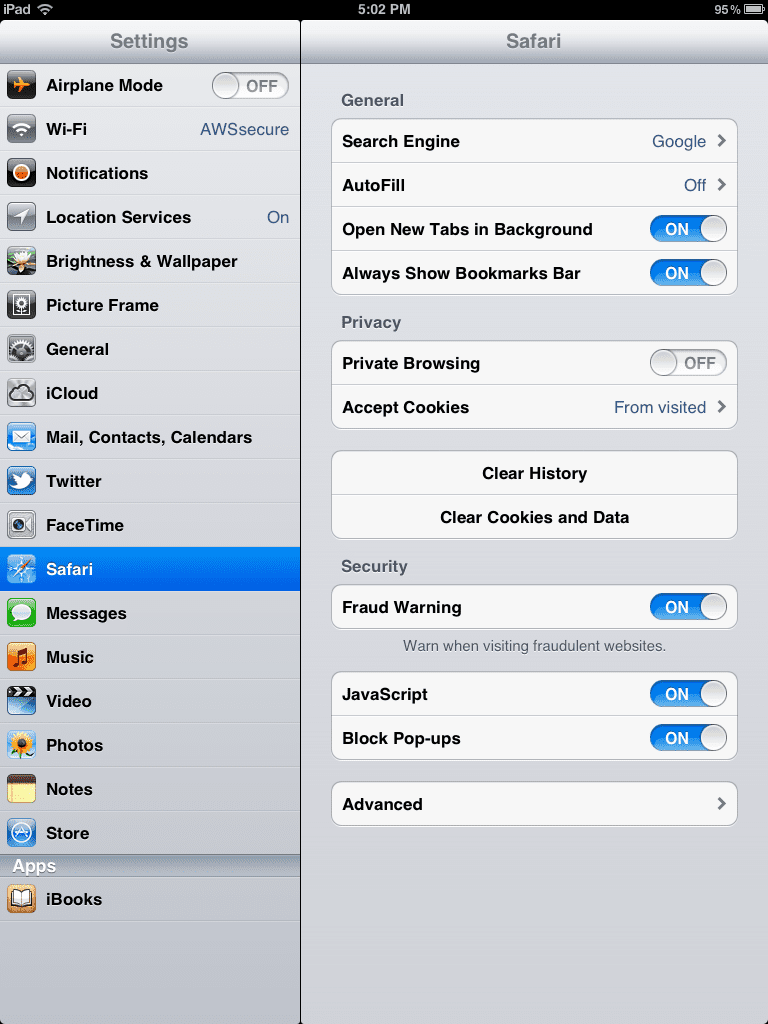
To enable the Bookmarks Bar, open the Settings App and tap Safari; on the right hand side, tap Always Show Bookmarks Bar so that it displays On.
That’s all it takes to turn on the Bookmarks Bar. Safari will now show it as enabled (although don’t be surprised if it’s empty since nothing has been added to it).
How to Manage the Bookmarks Bar
In addition to providing one-tap access to sites, the Bookmark Bar allows organizing bookmarks using folders. To demonstrate, we’ll use the following steps to add a Tech folder to the Bookmark Bar, and then we will add our favorite site, petri.com, as a bookmark to that folder.
Open the Safari App and enter petri.com in the browser address bar. Notice the extra blank space between the address bar and the tab list – this is the empty Bookmarks Bar.
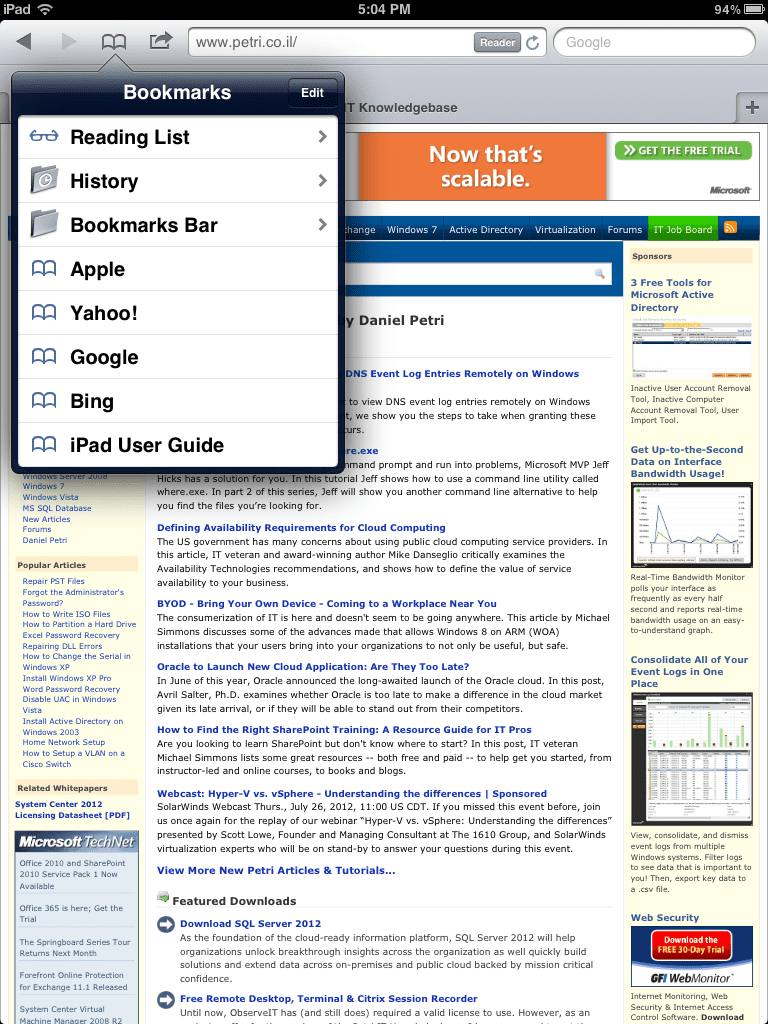
Our first step is to create the Tech folder. Start by tapping the Bookmark icon, which looks like an open book, to the left of the URL address. The Bookmarks menu will appear.
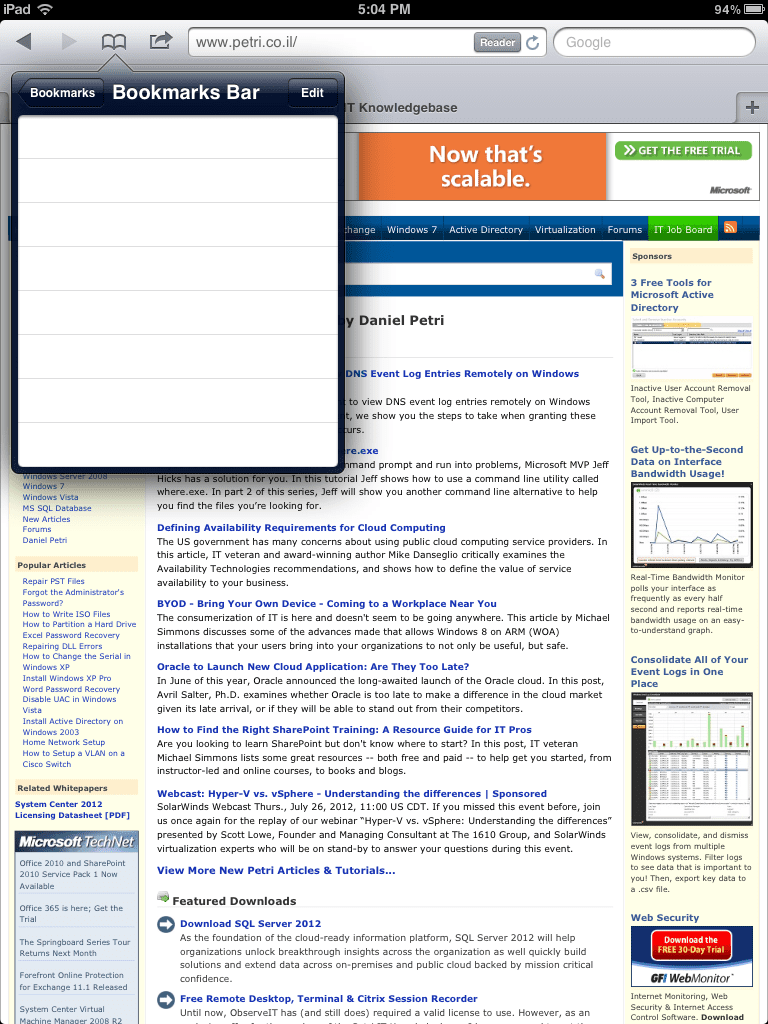
Go ahead and tap Bookmarks Bar. The Bookmarks Bar menu is displayed.
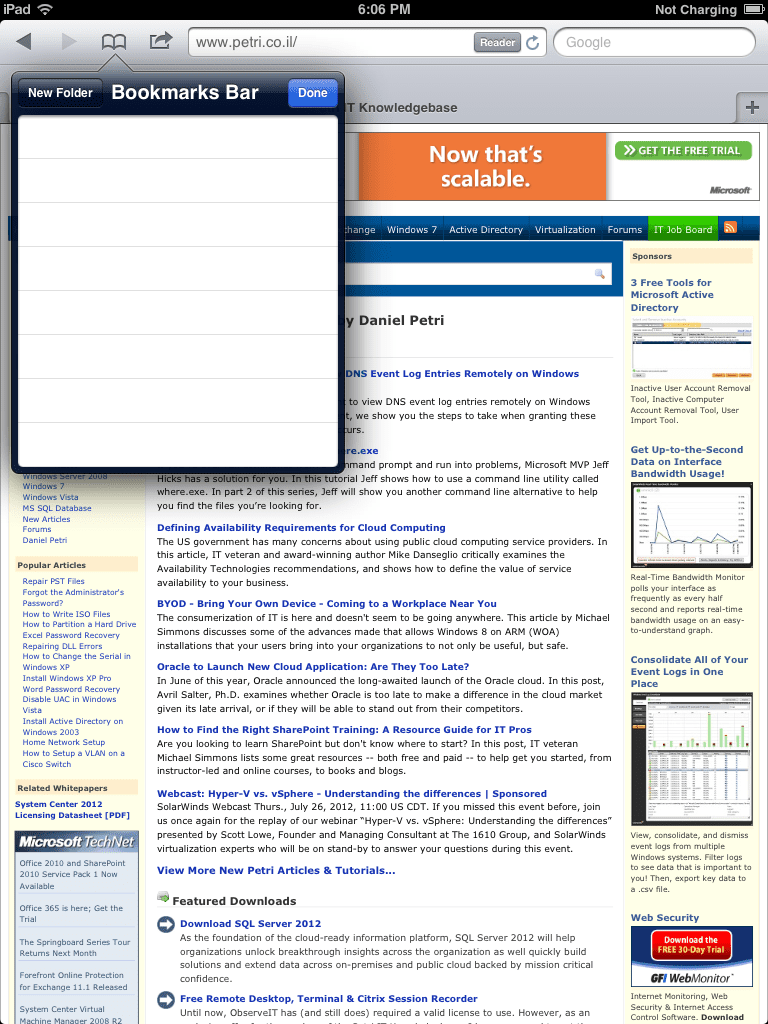
Tap the Edit button and the buttons change names. Tap the New Folder button.
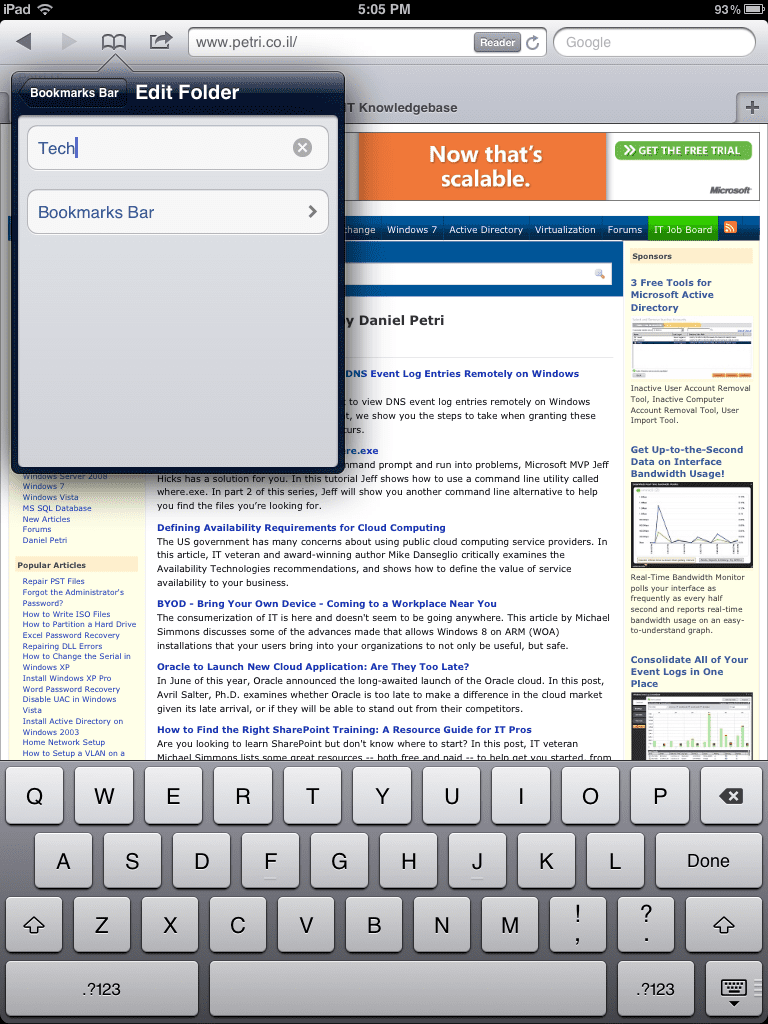
Enter the name of our new folder, “Tech,” into the title box. Notice that the Bookmarks Bar is displayed underneath the title. This is the location our new folder will be created, which is exactly where we want it. Tap the Done key on the virtual keyboard.
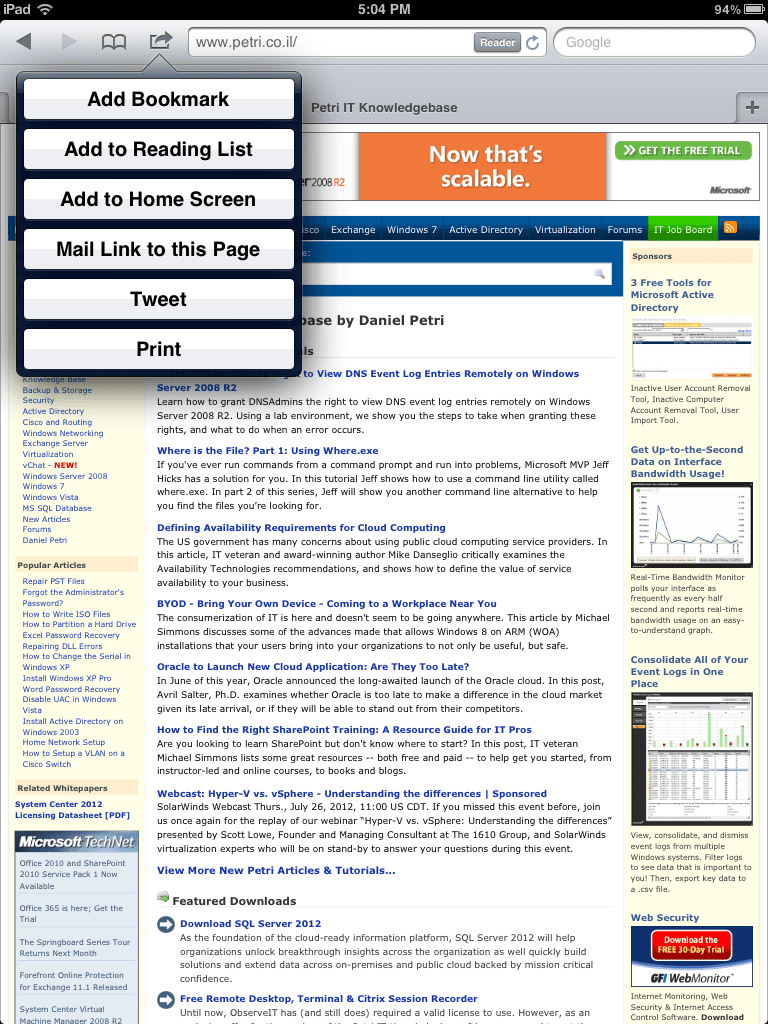
Hang in there! These final few steps will add the site petri.com as a bookmark into the Tech folder in the Bookmarks Bar. Start out by tapping the Share button, which looks like a square with an arrow flying out of it and is located to the left of the URL address. The Share menu will open.
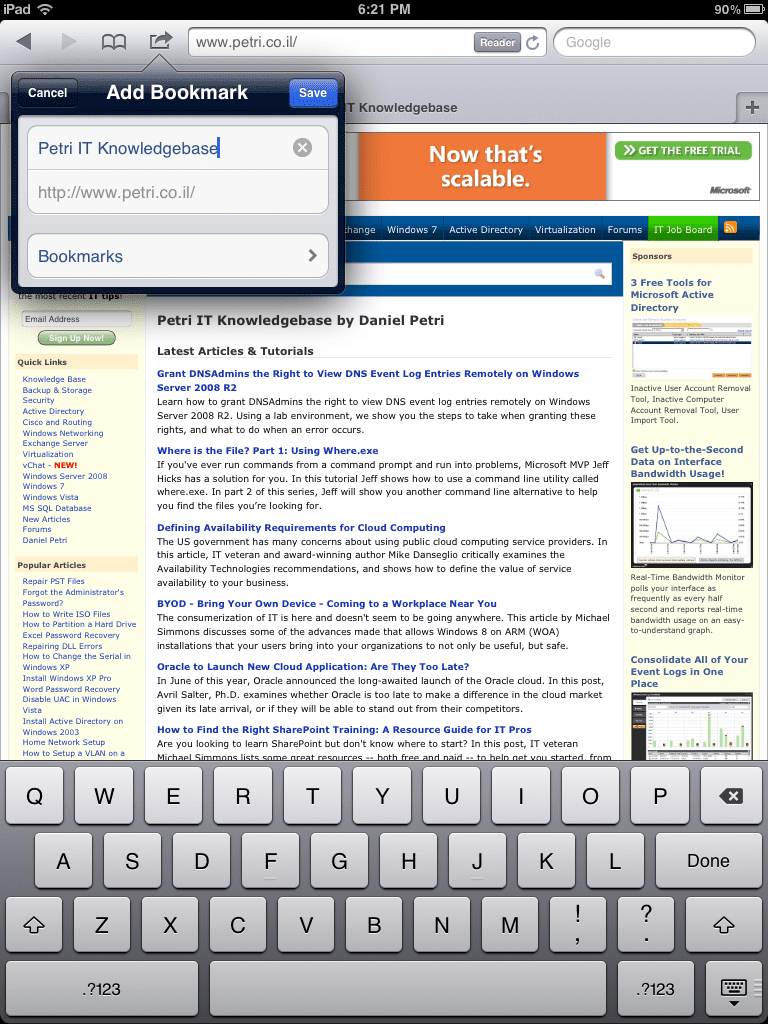
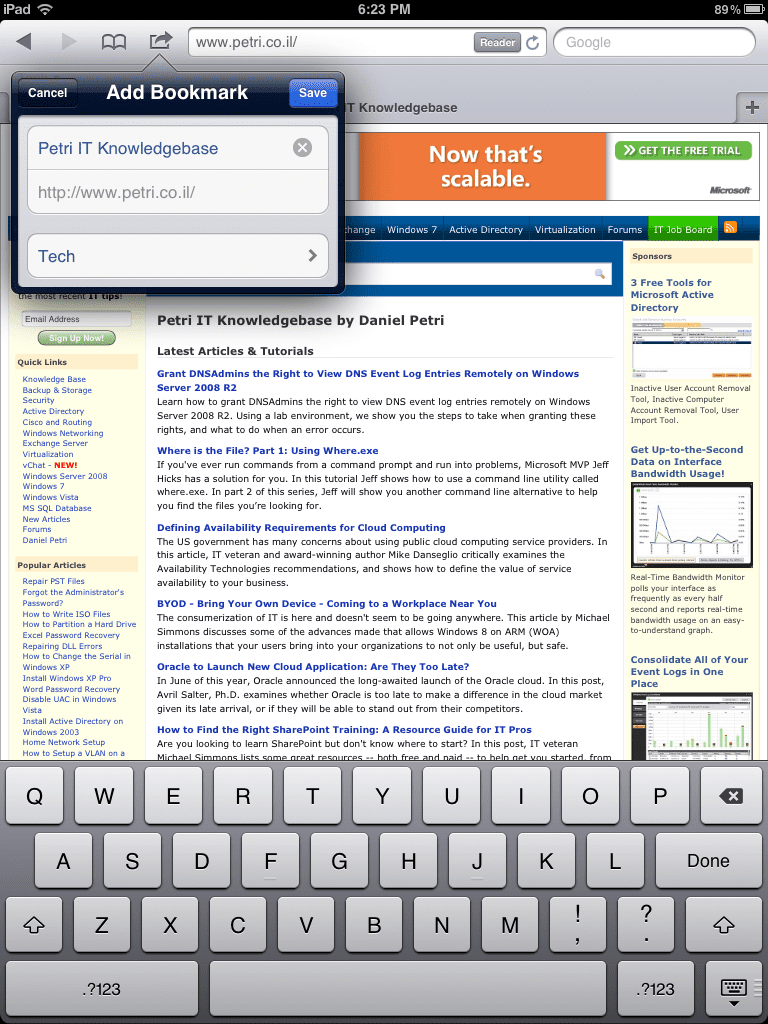
Tap Add Bookmark at the top, and the Add Bookmark dialog box will appear with default information filled in for title, URL, and location.
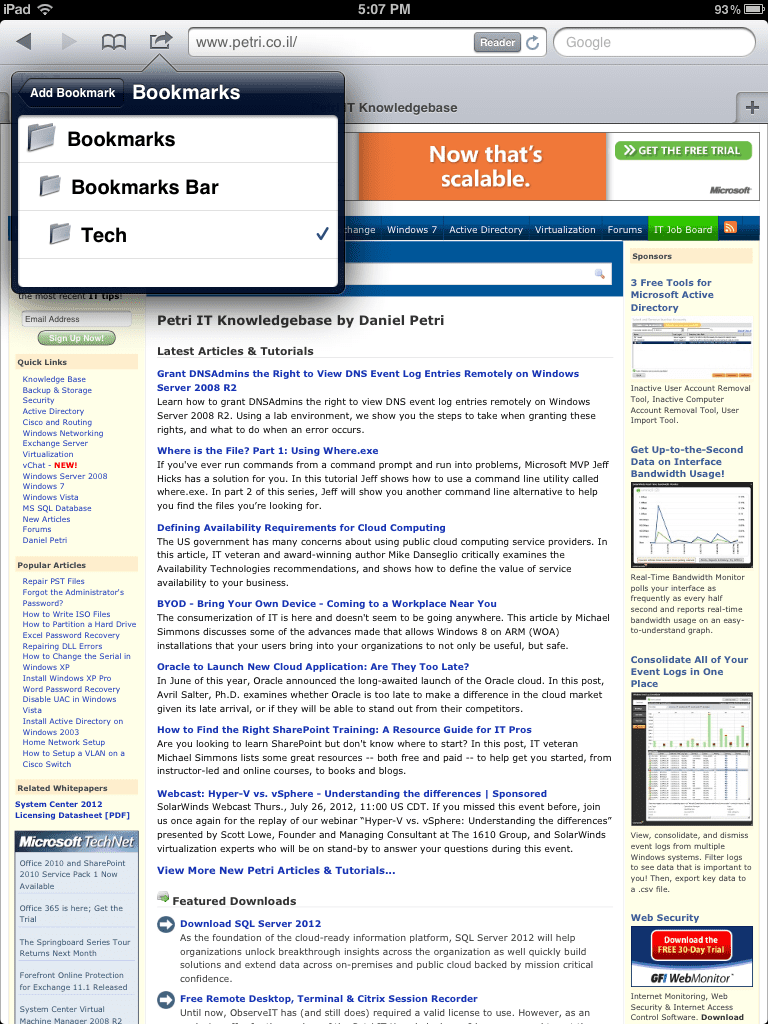
We’ll leave the title at the default. The URL can’t be modified, but we need to change the bookmark location in order to take advantage of our new Tech folder in the Bookmark Bar. To do this, press the location, in this case Bookmarks, so that a list of possible folders opens.
Tap on the Tech folder. You’ll be returned to the Add Bookmark dialog box, but the location will now display “Tech.”
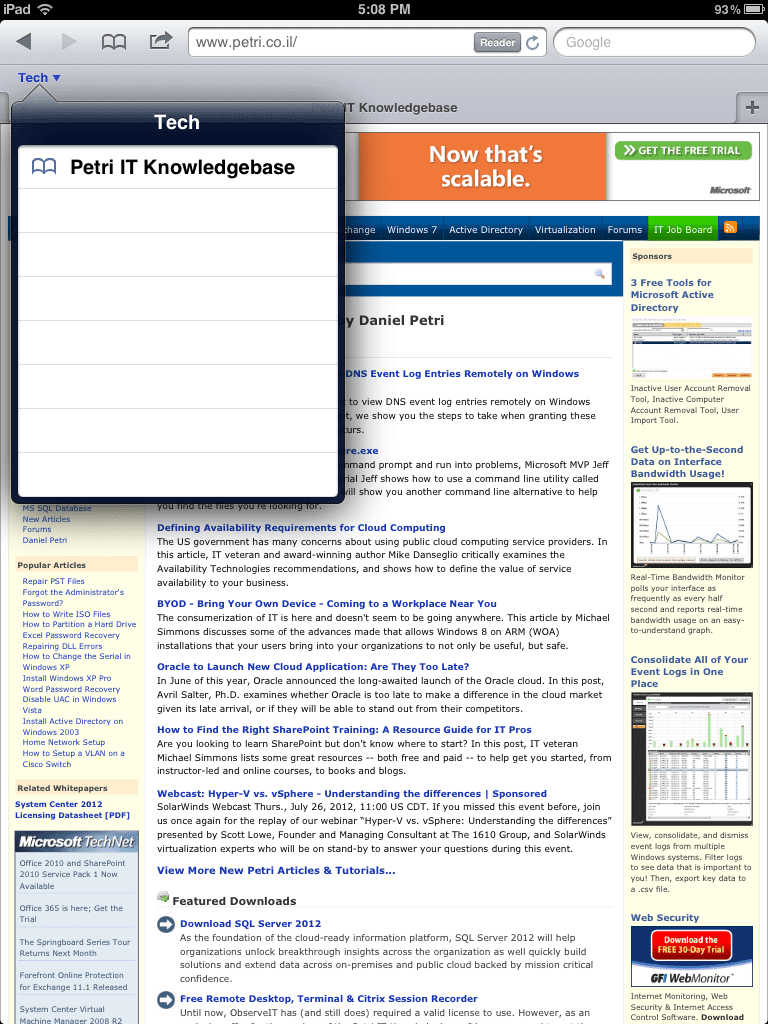
Tap the Save button. That’s it! On the Safari Bookmarks Bar the Tech folder will now be displayed.
Open the Tech Folder and the bookmark for our favorite site is there ready and waiting.
By capitalizing on the Bookmarks Bar along with folders, users of Safari in iOS 5.x can improve the management of their favorite Internet sites to visit. Watch for future Petri articles in which I’ll continue exploring tips, tricks, and techniques to turn the iPad into an indispensable tool.


