


One of the most annoying issues with Windows is when your hardware manufacturer fails to provide a proper driver for the operating system. Even when you do find the proper driver, sometimes the manufacturer releases an updated version which you then need to install on top of the older version. As if that’s not enough, every version of Windows from the past 10 years or so, including server versions will retain the older driver binaries even if you upgrade or change hardware.
There is a logic behind this behavior. If, for example, you’re using a removable USB disk drive, which has once been plugged in, Windows will install the appropriate driver for it. When you eject that drive, Windows retains the drivers so that they will be ready the next time you connect the drive.
But what about replacing a video adapter? A network interface card? A printer that has been thrown away? What about working with a laptop that you once used to connect to an external device, and has not used that device since? What happens to that driver if you never connect that device to your computer again?
With time, your computer will gather an increasing number of unused drivers that not only take space on your hard disk, having been still installed, they might cause problems if they are somehow enabled. In some cases they can also cause hardware conflicts. And to make things worse, when you do want to use the same device after a long period of inactivity, even if you re-install an updated version of the driver, Windows might still use the older version of it.
So how do you remove these old and un-used drivers? Let me show you.
By default, Device Manager will only show you the devices it’s currently using.

What you need to do is to configure Device Manager to show all those non-present device drivers, sometimes known as “phantom devices”.
Warning!
This document contains instructions for editing the registry. If you make any error while editing the registry, you can potentially cause Windows to fail or be unable to boot, requiring you to reinstall Windows. Edit the registry at your own risk. Always back up the registry before making any changes. If you do not feel comfortable editing the registry, do not attempt these instructions. Instead, seek the help of a trained computer specialist.
Method #1:
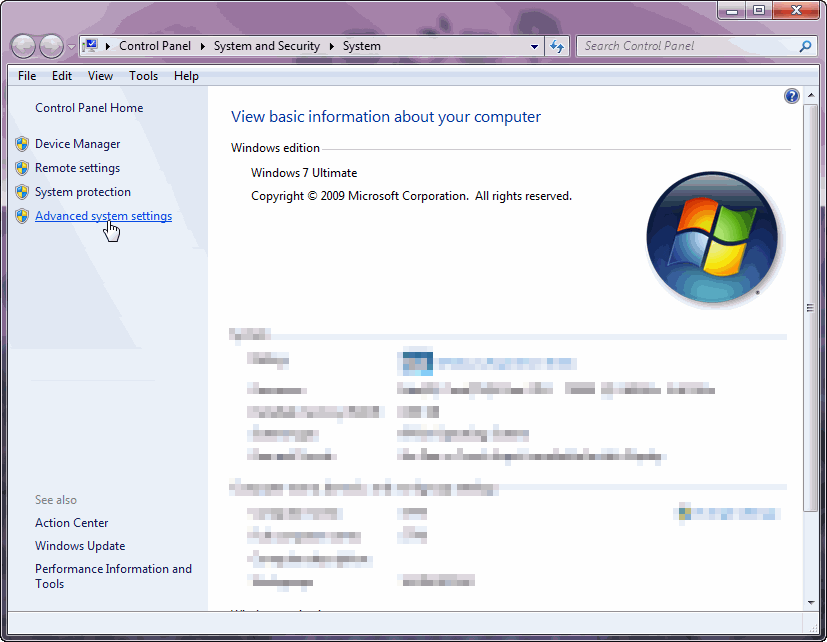
1. Go to Control Panel and double click on System. You can also right-click “Computer” on the Start menu (or on the desktop if it’s shown there) and choose Properties.
Note: A faster way for opening up the System applet is to press the Windows logo key on your keyboard and then press Pause/Break at the same time.
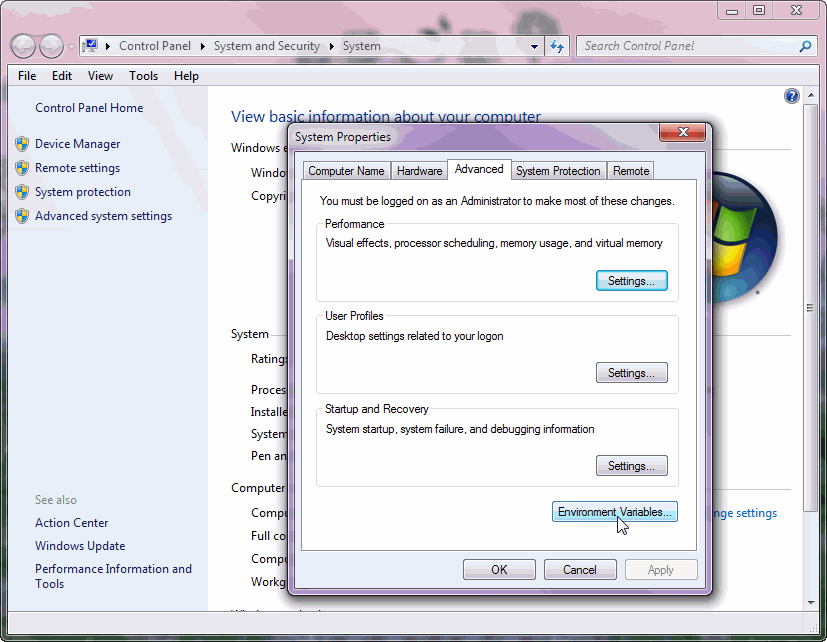
2. Click on “Advance System Settings” link, and then click on the “Environment Variables” button.
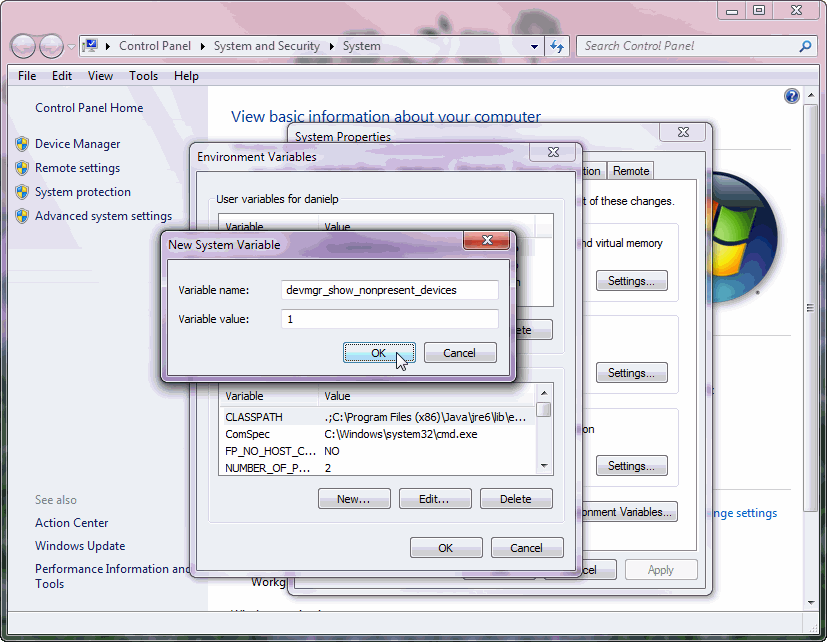
3. In the System Variables section click on the “New” button.
4. In the New System Variable dialog box, under the Variable Name value enter devmgr_show_nonpresent_devices (just copy the value from here and paste it there) and give it a variable value of 1.
Click Ok.
5. In the Environment Variables window notice how the new variable appeared in the System Variables section. Click Ok.
6. In the System Properties window click Ok.
7. Log off and log on.
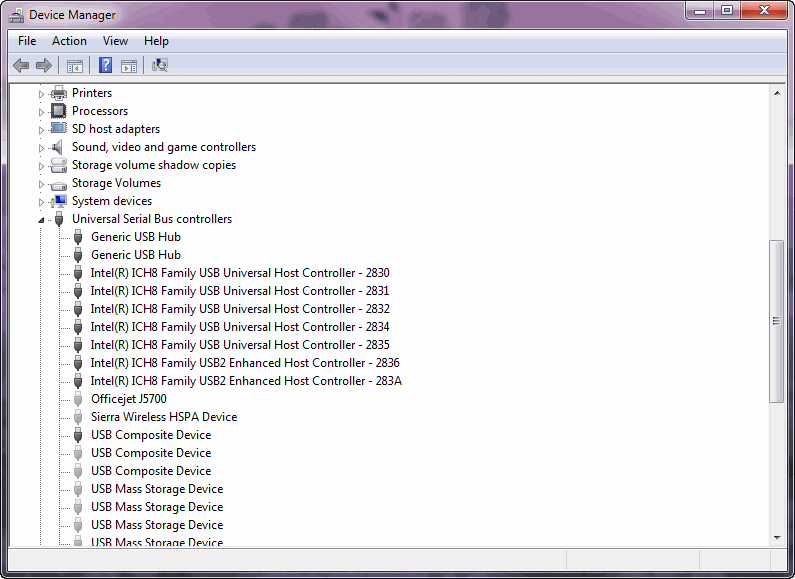
8. Open Device Manager (Control Panel > System > Hardware > Device Manager).
9. From the View menu click Show Hidden Devices and notice the change.
Method #2:
You can perform the same task by using the registry (or even create a logon script that will add the following key to the registry):
1. Open Registry Editor.
2. In Registry Editor, navigate to the following registry key:
HKEY_LOCAL_MACHINE\SYSTEM\CurrentControlSet\Control\Session Manager\Environment
3. Create the following value (DWORD):
devmgr_show_nonpresent_devices
and give it a value of 1.
4. Close Registry Editor and reboot.
Important Note: Before removing the old drivers for devices you still use, it’s a good idea to find and download the driver updates to a folder on your drive – especially if they’re for your networking devices. If you know specifically which drivers need updating you can search for new drivers manually, but if you don’t, a driver updater tool can perform an automated search and help you locate the correct downloads.
If you’re specifically looking for updates for Windows 7, Device Doctor also has a handy list of the top-requested Windows 7 driver updates to get you started.